After building the Hadley, I wanted something more. There were a few ways to take better astrophotos: aim properly, collect more light, motorize a mount to follow earth’s rotation, or build a bigger telescope to collect more light. I chose to build a bigger telescope.
The Leavitt is the product of a year of work. This telescope is an 8" diameter f/4.5, with a focal length of 48.5". Its 3-pole design makes for easy adjustment of focal length to accomodate a camera fits into a car and weighs less than 20 pounds.
The mirror is an 8" diameter f/4.5, with a focal length of 89.5". I polished and parabolized it myself from January 2024 to August 2024. Its short focal length means the telescope’s views are less magnified and therefore brighter, perfect for deep sky objects. It has also given me great views of Mars, Jupiter, and Saturn.
The body
For the body, I used the existing Leavitt 3D printed telescope design. It uses three 0.5" aluminum rods and 3D printed parts. Each circle is split into three sections joined by screws to fit onto a standard smaller-than-8" print bed. It took two 1kg filaments of PLA, and since .
I designed a few of my own replacement parts. The original mirror cell (the part that holds and tilts the primary mirror) held the mirror in place with glue on three points, but that glue may slightly deform a mirror by a few nanometers. Since my mirror turned out to be accurate to within 1/20th of a wavelength, instead of glue I designed a mirror cell that encloses the mirror in plastic using three spokes with built-in clips stopping the mirror from falling out.
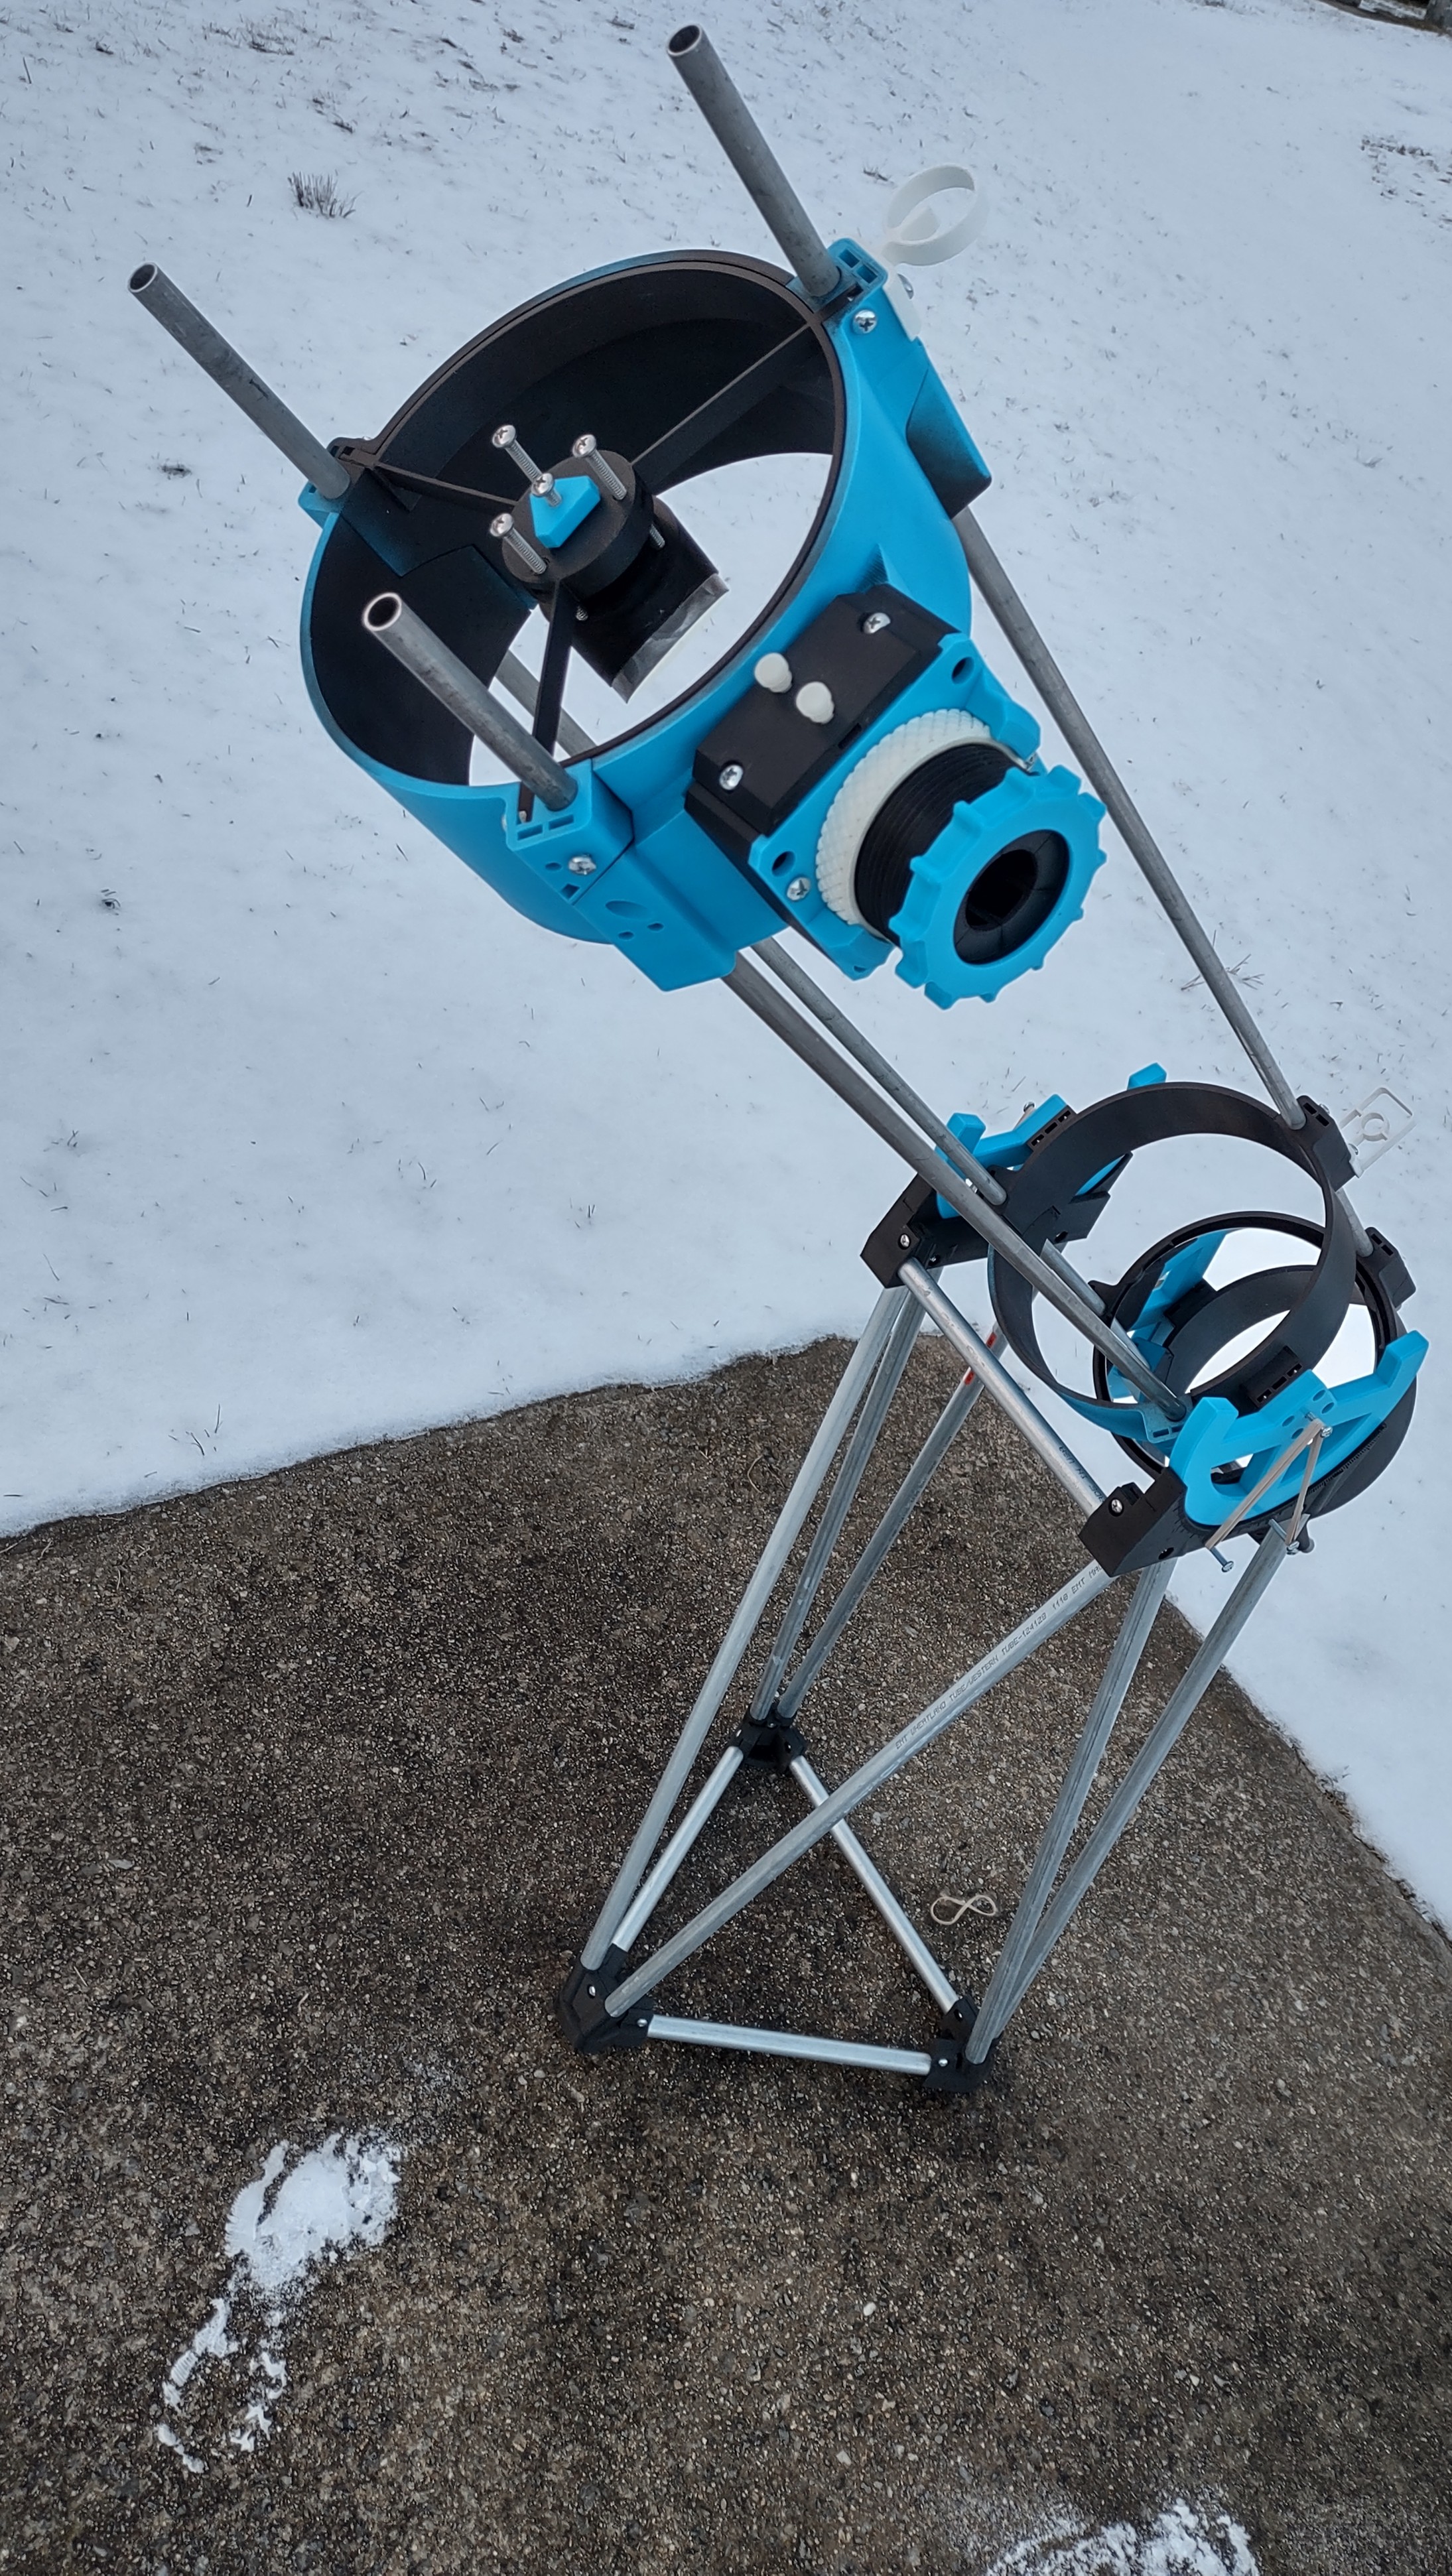
The mirror mount is an all-new design inspired by the Hill Mount I made for the smaller Hadley telescope. I don’t have access to woodworking tools, so I took a page from the mount I designed for my Hadley and designed a 3D printed truss structure. The telescope’s width is more than the size of my 3D printer’s bed, so I had to design it with a front crossbar.
Compared to the Hadley’s Hill Mount, which is 2.5’ tall, my Leavitt mount is 3’ tall. Because the Leavitt’s mirror has a longer focal length, its telescope tube is longer, so I thought the extra height was needed to stop the tube from hitting the ground when aimed upwards. However, I didn’t account for the extra weight of the mirror, which made the telescope tube bottom-heavy and moved the pivot point closer to the mirror. That meant that the extra height worked against the mount and made it more prone to tipping over. It works, but the design could be made more stable someday.
The mirror
I didn’t buy this telescope’s mirror - instead, I manufactured it myself. Amateur mirror making has a long history, and there are textbooks published a hundred years ago that document processes that still works to this day. This was my first time polishing a mirror, and I’m very proud of the end result: a parabolic surface accurate to within 1/20th of a wavelength of visible light - 25 nanometers or so. I worked on this mirror from January 2024 to August 2024, and first light was in December 2024, just in time to see the Mars conjunction.
| 1 min
| 68 words
Today, I tried finding some galaxies. I couldn’t see M101, couldn’t see M105, but did see M81 and M82 by eye. It was tough, but I finally took a phone pic. I decided to give Pingu Camera a try… and the phone plus printed adapter plus phone remote shutter plus waiting a while for vibrations to die down worked! I got a picture of both M81 and M82!!
| 1 min
| 31 words
My 8" telescope has been upgraded with some new printed shields to block unwanted light near the top.
Pics of said light blocking baffles. Also added a mount for my pifinder.
| 1 min
| 24 words
Lunar eclipse! Funny enough the telescope made things brighter and therefore even during totality it looked less contrasting through the telescope than by eye
| 1 min
| 52 words
Goodbye mars! (Zoom in!)
Taken using my 3D printed telescope, with a crowd of friends invited to watch the occultation of mars by the moon! The phone I was taking photos on ran out of battery, so I hastily threw a friend’s iphone into the holder just in time to capture these.
| 1 min
| 164 words
I finally used my new 8" telescope with a working mirror cell! Report:
Jupiter is nice and bright!
M42 is so much brighter than in my first telescope! It’s green and I can the bat wings and texture in the trapezium along with four stars!
There are so many stars everywhere!
High power reveals flaws. High power stars look like ovals. After some investigation, my secondary mirror wasn’t centered in the eyepiece view.
Read More
| 2 min
| 214 words
The part of the telescope that holds a mirror in place is called the “mirror cell”. The simplest way to hold a mirror in place is with three dabs of silicone glue. If glue is too hard, it can pull on the mirror and the stress will distort its shape on a scale of hundreds of nanometers, which is bad.
Small mirrors can usually get away with just three dabs of glue.
Read More
| 1 min
| 118 words
Introducing… Pingu Camera. I bought a used DSLR for astrophotography four months ago hoping it would take better photos than my phone. I 3D printed an adapter for it to fit into a standard eyepiece slot. Unfortunately it was a bit of a failure for two reasons: firstly, this camera isn’t mirrorless, so it had a shutter inside it, and when that shutter flips up to take photos it sends vibrations through the entire telescope.
Read More
| 1 min
| 207 words
8" mount v1 complete!
After several days of designing, 3D printing, and experiencing the joys of my favorite telescope related activity, hacksawing through metal, I managed to assemble a complete mount! Design-wise, I had to replace 0.5" screws with 0.75" screws in a few places because the redesigned EMT tubes were too close together. The telescope uses only 0.5" screws, so it would have been nice to match, but it’s fine for an one-off.
Read More
| 1 min
| 160 words
Every telescope needs a mount, to hold it up and let it rotate. 6 months ago, I thought that I was close to the finish line, since all I had to do was make a mirror and a mount! Then the mirror took six months. Now I need to sit down and actually finish this mount. My 4.5" scope uses a truss of EMT steel tubes and the scope sits on a wide C-shaped part.
Read More