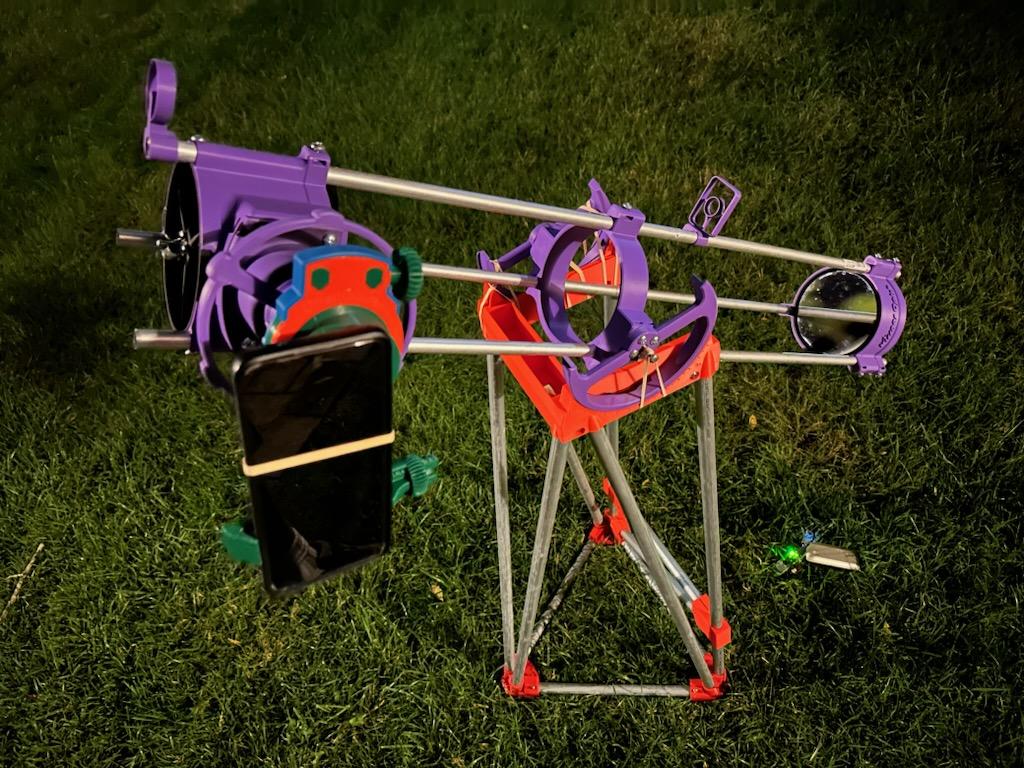
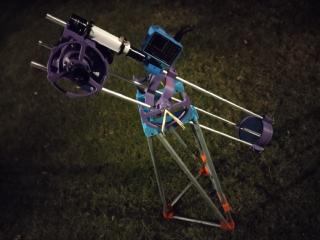
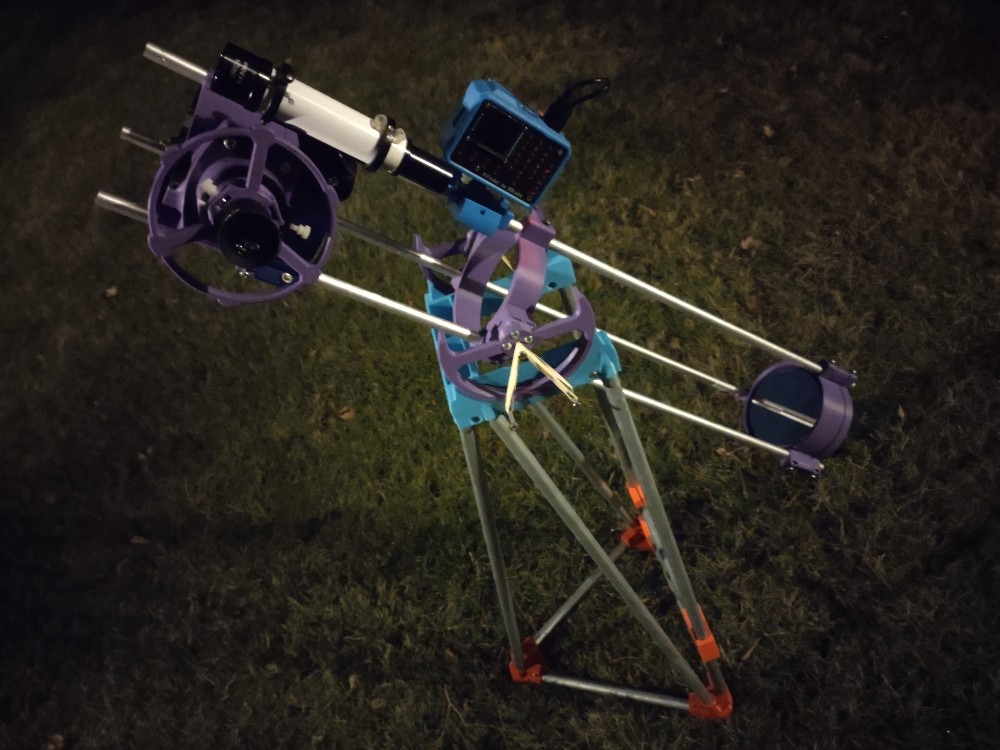
This little 3D printed telescope kickstarted my journey into astronomy. The design is free and open source, and uses 3D printed parts, aluminum tubes, and hardware store nuts and bolts.
It sits on the Hill Mount, a portable and cheap altitude mount I designed that costs around $20. It’s lightweight enough I have walked two miles to a subway stop while carrying it the whole time.
Azimuth is controlled by physically sliding the plastic across the ground. Sure, I could put it on a turntable, but that would make it heavier.
It has a number of upgrades - including an integrated finderscope and a high-tech computerized aiming system I printed and hand-soldered myself.
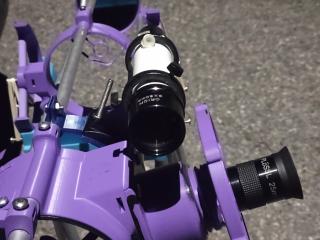
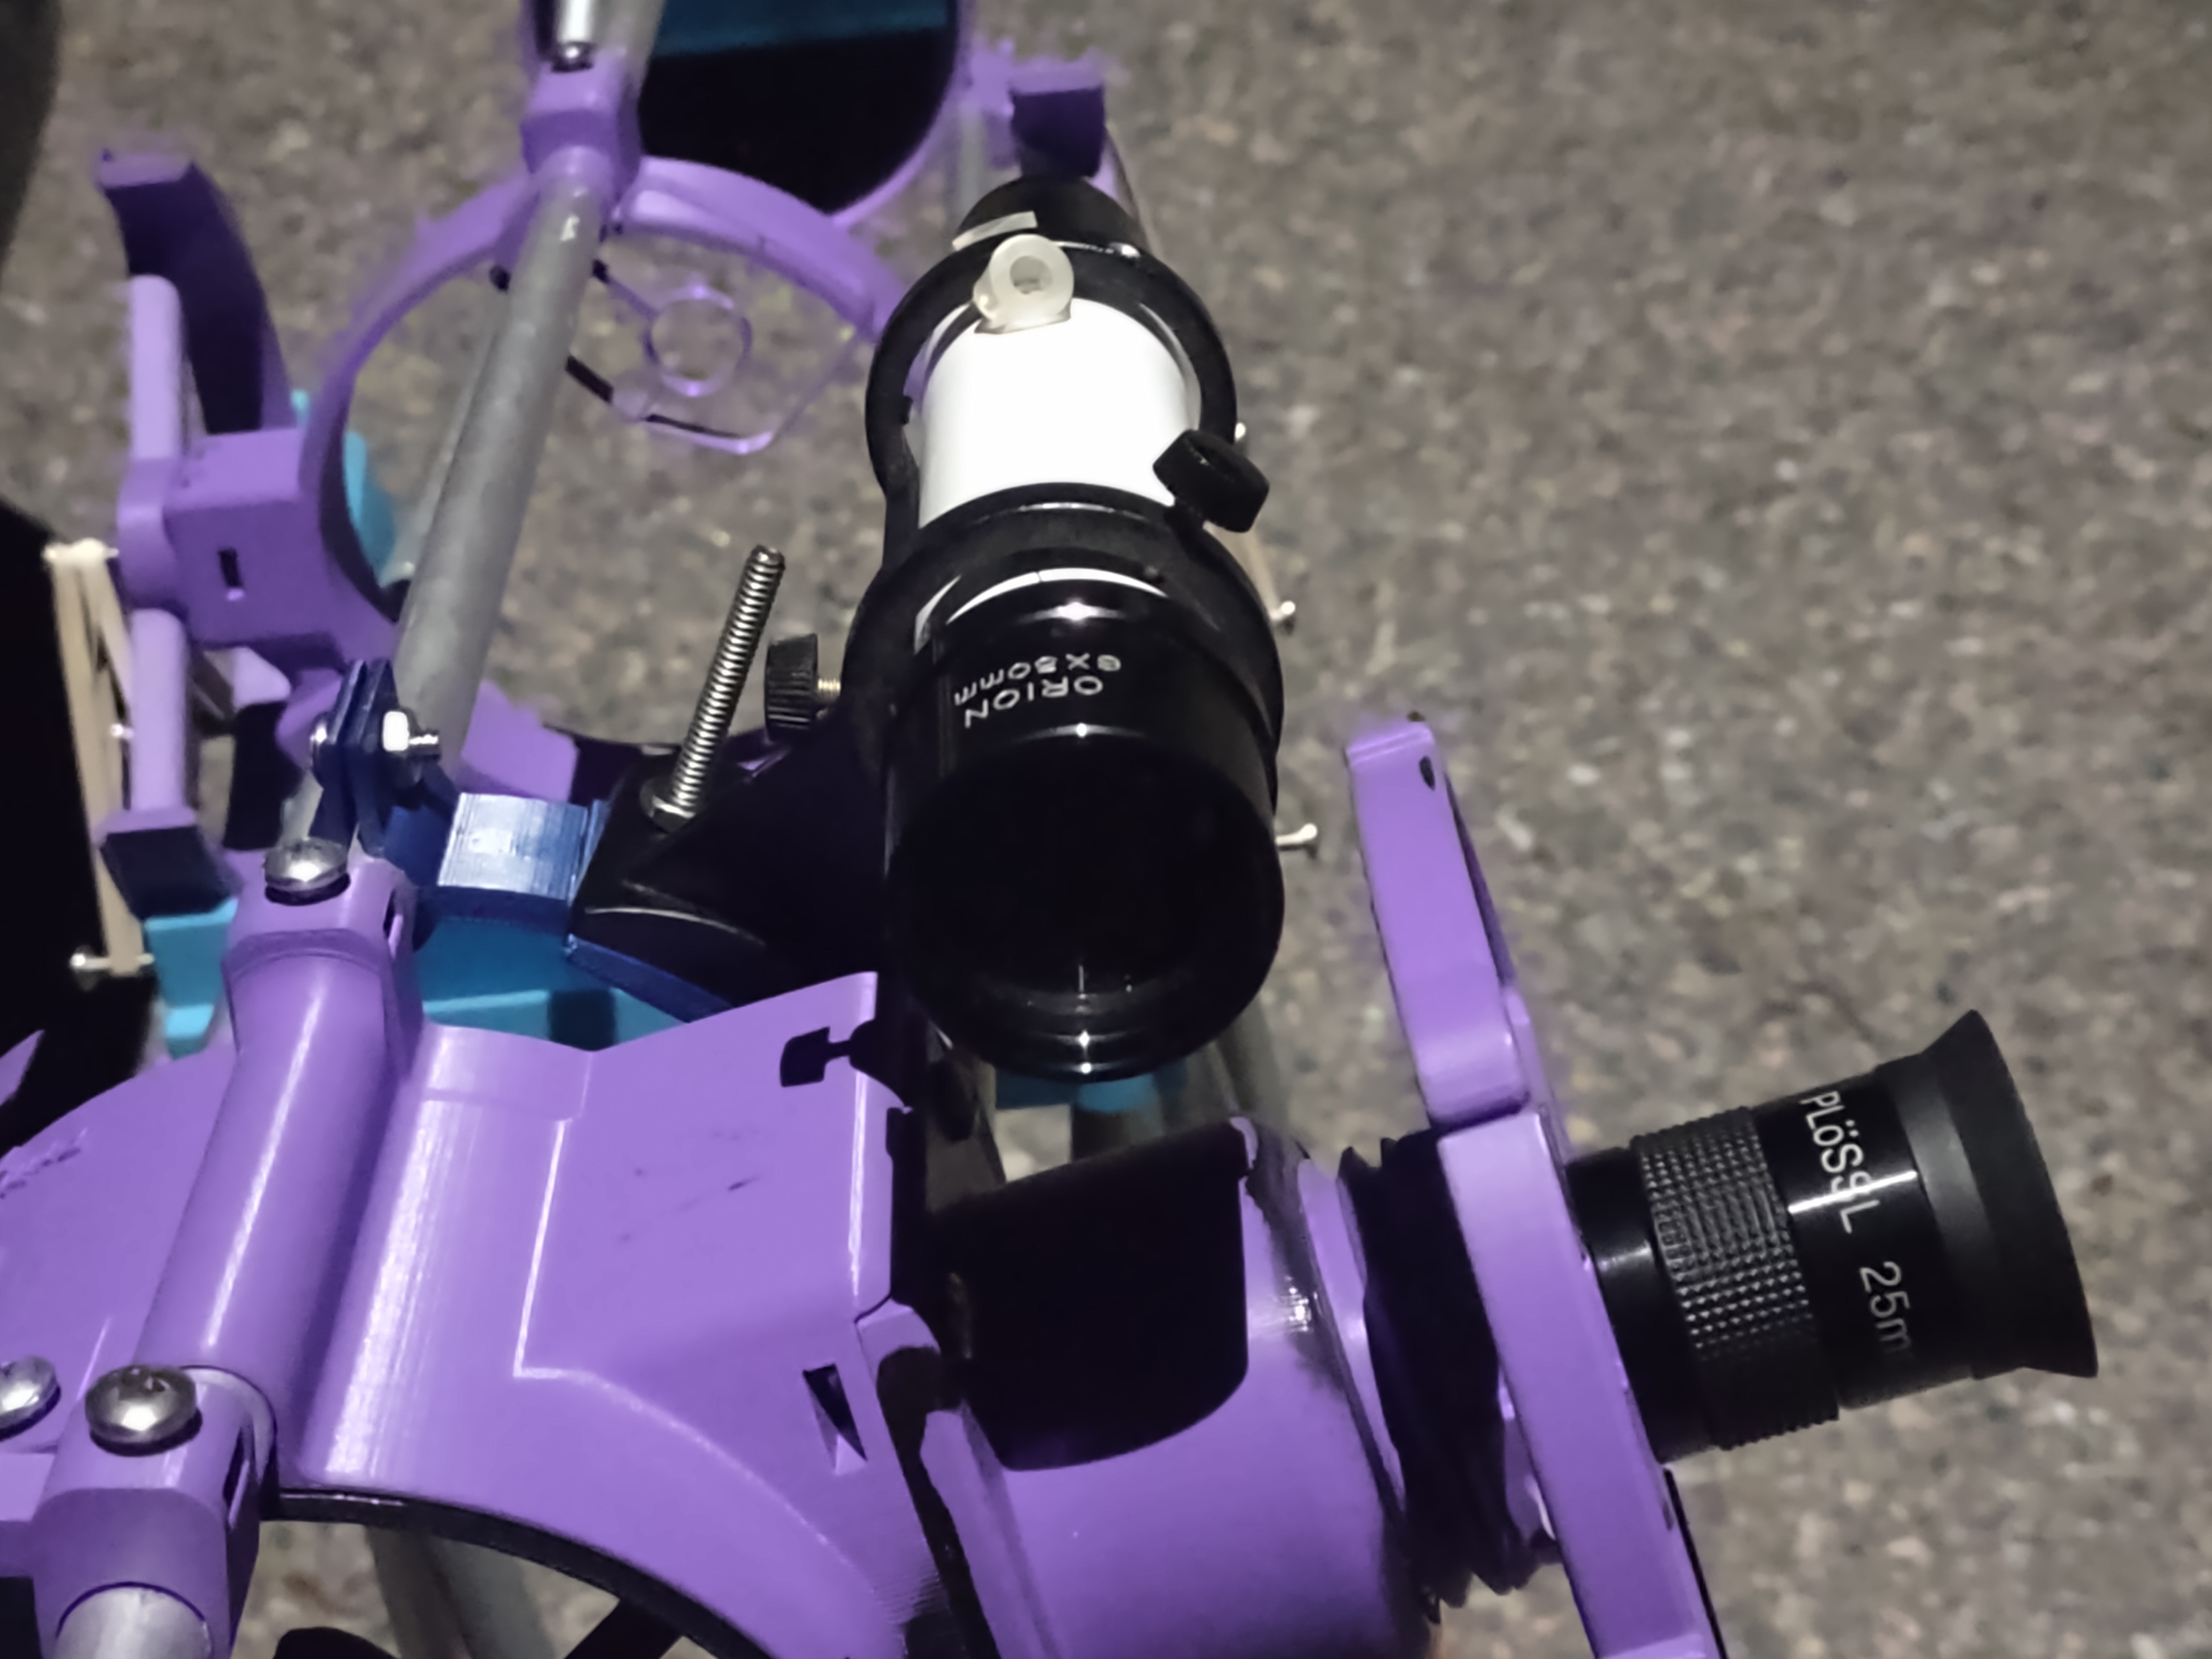
Finderscope
The first upgrade is an 6x50 finderscope that says “orion” on it. I found it in my local astronomy club’s shelf of spare parts and designed a 3D printed adapter for it to fit onto the telescope. It features integrated crosshairs and helps me line up planets at a glance!
Sliced Pifinder
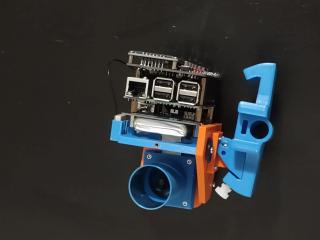
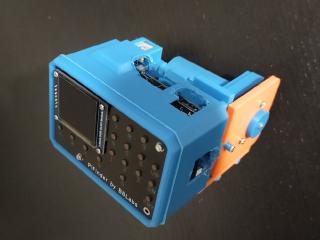
The second upgrade is the Sliced PiFinder. It’s a targeting computer that permanently lives on my telescope - which is an incredible sentence. We truly live in the future.
The PiFinder is a device that uses a raspberry pi and a camera to take pictures of the sky and compute where in the sky your telescope is aiming, even with high light pollution. Since it knows where the telescope points, you can select a particular galaxy or nebula and it will tell you how to push the telescope to get there.
PiFinders are an open-source project that can also be bought for $500 from the designer. Mine was built for $110 - a mere slice of the cost. The stock PiFinder is designed for a Raspberry Pi 4 using the Raspberry Pi High Quality Camera ($50) with a $50 lens, but I 3D printed and assembled the parts myself, used a scavenged battery pack and previous-generation Raspberry Pi 3 from a defunct project, and a $30 IMX462 camera and $12 lens.
Taking photos on a budget
I like to think of myself as on the cutting edge of cell phone astrophotography. I use a 3D printed clamp to hold my phone up to the eyepiece and take photos using my phone camera. However, tapping the phone button causes vibrations that wobble the telsecope. To fix that, I use a raspberry pi pico microcontroller as a wireless remote shutter. I programmed it to act as a bluetooth mouse and connect to my phone. When I press the built-in button, it moves the mouse to the center of the screen and clicks the “take picture” button. To see pictures this setup has taken, take a look at my Astrophotos page!
| 1 min
| 110 words
Here’s a cutaway view of my telescope’s 3D printed bases to hold rods in place. The rods go into the giant cylinders, but how do you stop them from slipping out? Insert a nut in on one side of the hole, and then screw it in from the other side. The cut in the top means the entire piece bends to hold the rod in tightly! This is so annoying to design because my rods are so close together you need to make sure that the cutaway for the nuts and screws don’t accidentally cut a hole in the wall of the places where the rods go.
Read More
| 2 min
| 299 words
I took my new wooden-dowel telescope mount for a spin, and got pictures of Jupiter and Saturn with my high-power eyepiece!
I took many pictures, and a few videos. I also figured out how to control the shutter speed on my phone’s camera, and got many photos at 1/40s shutter speed. Using a smaller shutter speed takes the planets from blinding white blurs to circular colored blurs, I assume because it lets in less light.
Read More
| 1 min
| 52 words
It’s still sturdy, but wobbles when I hit it. I think it might be the springiness of the wooden dowels that’s causing the motion. I could try adding two more struts and seeing if it works but I don’t really want to. It’s also very colorful now.
Time for EMT, I guess!
| 2 min
| 247 words
Last telescope update I finished mount v2 and was stuck because it wobbled. One way to try again is to make the rods out of metal EMT instead of wooden dowels. I bought a hacksaw and spent a while hacksawing my EMT to the right length before learning there were specific pipe cutting tools that were far easier to use. Oops! I’ll also need to redesign my mount to use the larger 0.
Read More
| 1 min
| 68 words
Update: I’ve learned about the existence of EMT conduit, which is steel so it’s much stiffer, cuttable with a handsaw, and most importantly way cheaper than the aluminum tubes I bought before!
The downside is it’s sized in nominal diameter, which means lying. The size “1/2 in” has an outer diameter of 0.706 in. But I’ve faced nominal diameter before and this time I’m prepared. Let’s try this.
| 1 min
| 162 words
It didn’t work. The main type of wiggling I was trying to stop is the top part twisting around the z axis compared to the bottom part. This new mount stood up well, but if I placed the telescope on the mount and gave it a sideways nudge, the telescope would wiggle from side to side at a period of about 1/4 s. It does seem less wobbly than my previous square mount, but it’s still pretty wobbly.
Read More
| 1 min
| 38 words
Starting to build telescope mount v2! I’m using 0.5in rods, and v1 had holes 0.52in wide. This one has holes 0.51in wide, and that was a mistake, it made getting the rods in there so much more annoying.
| 1 min
| 84 words
I was unsure about how to model this part to make it non-wobbly so I looked up and watched a full lecture from MIT OCW about vibration reduction. it didn’t really help but now I understand that when you bend a stick, the outer part expands and the inner part shrinks and so by making bigger areas farther from the bending (weird) you can resist shrinking and growing a bit more.
Read More