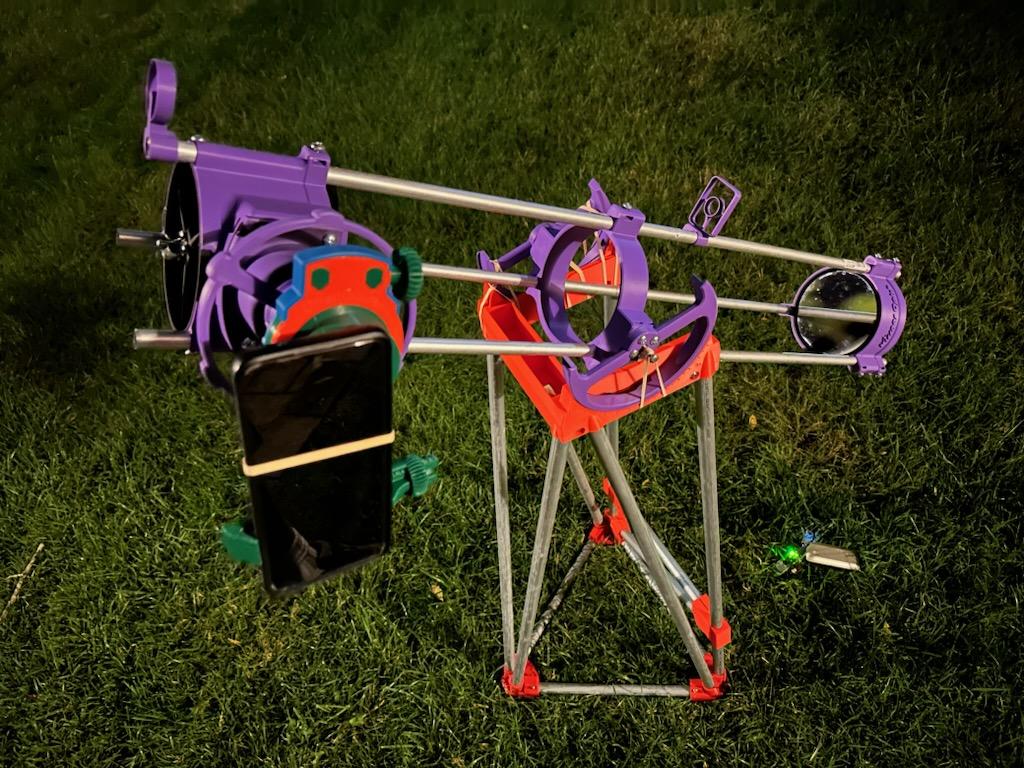
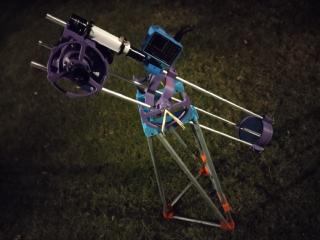
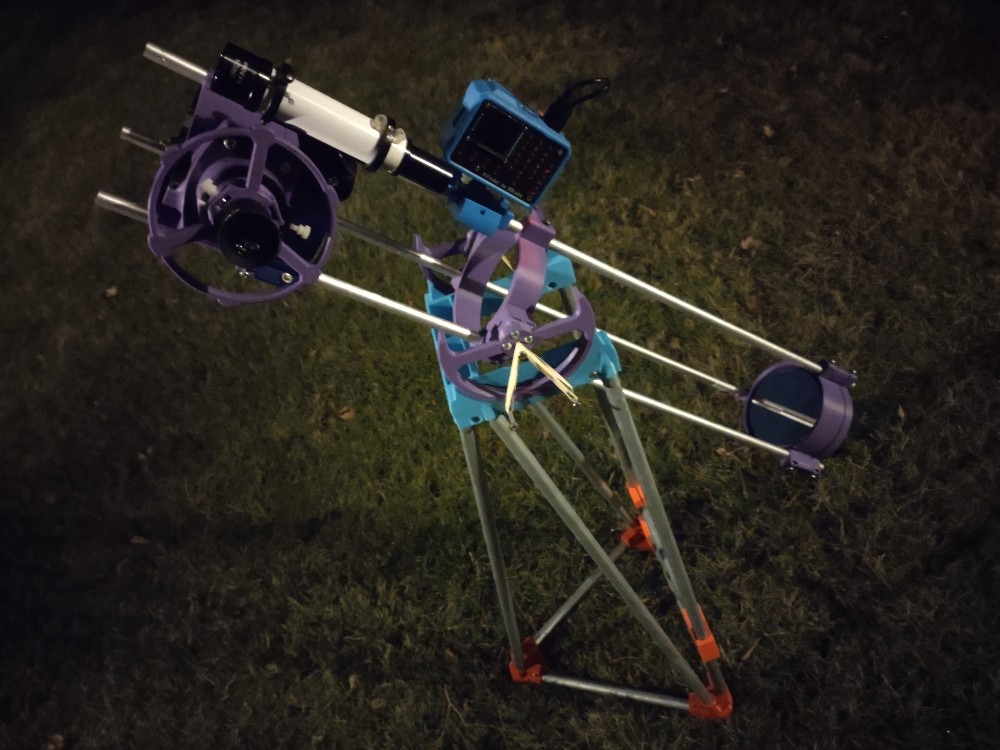
This little 3D printed telescope kickstarted my journey into astronomy. The design is free and open source, and uses 3D printed parts, aluminum tubes, and hardware store nuts and bolts.
It sits on the Hill Mount, a portable and cheap altitude mount I designed that costs around $20. It’s lightweight enough I have walked two miles to a subway stop while carrying it the whole time.
Azimuth is controlled by physically sliding the plastic across the ground. Sure, I could put it on a turntable, but that would make it heavier.
It has a number of upgrades - including an integrated finderscope and a high-tech computerized aiming system I printed and hand-soldered myself.
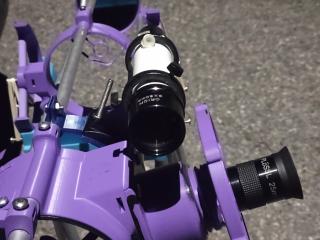
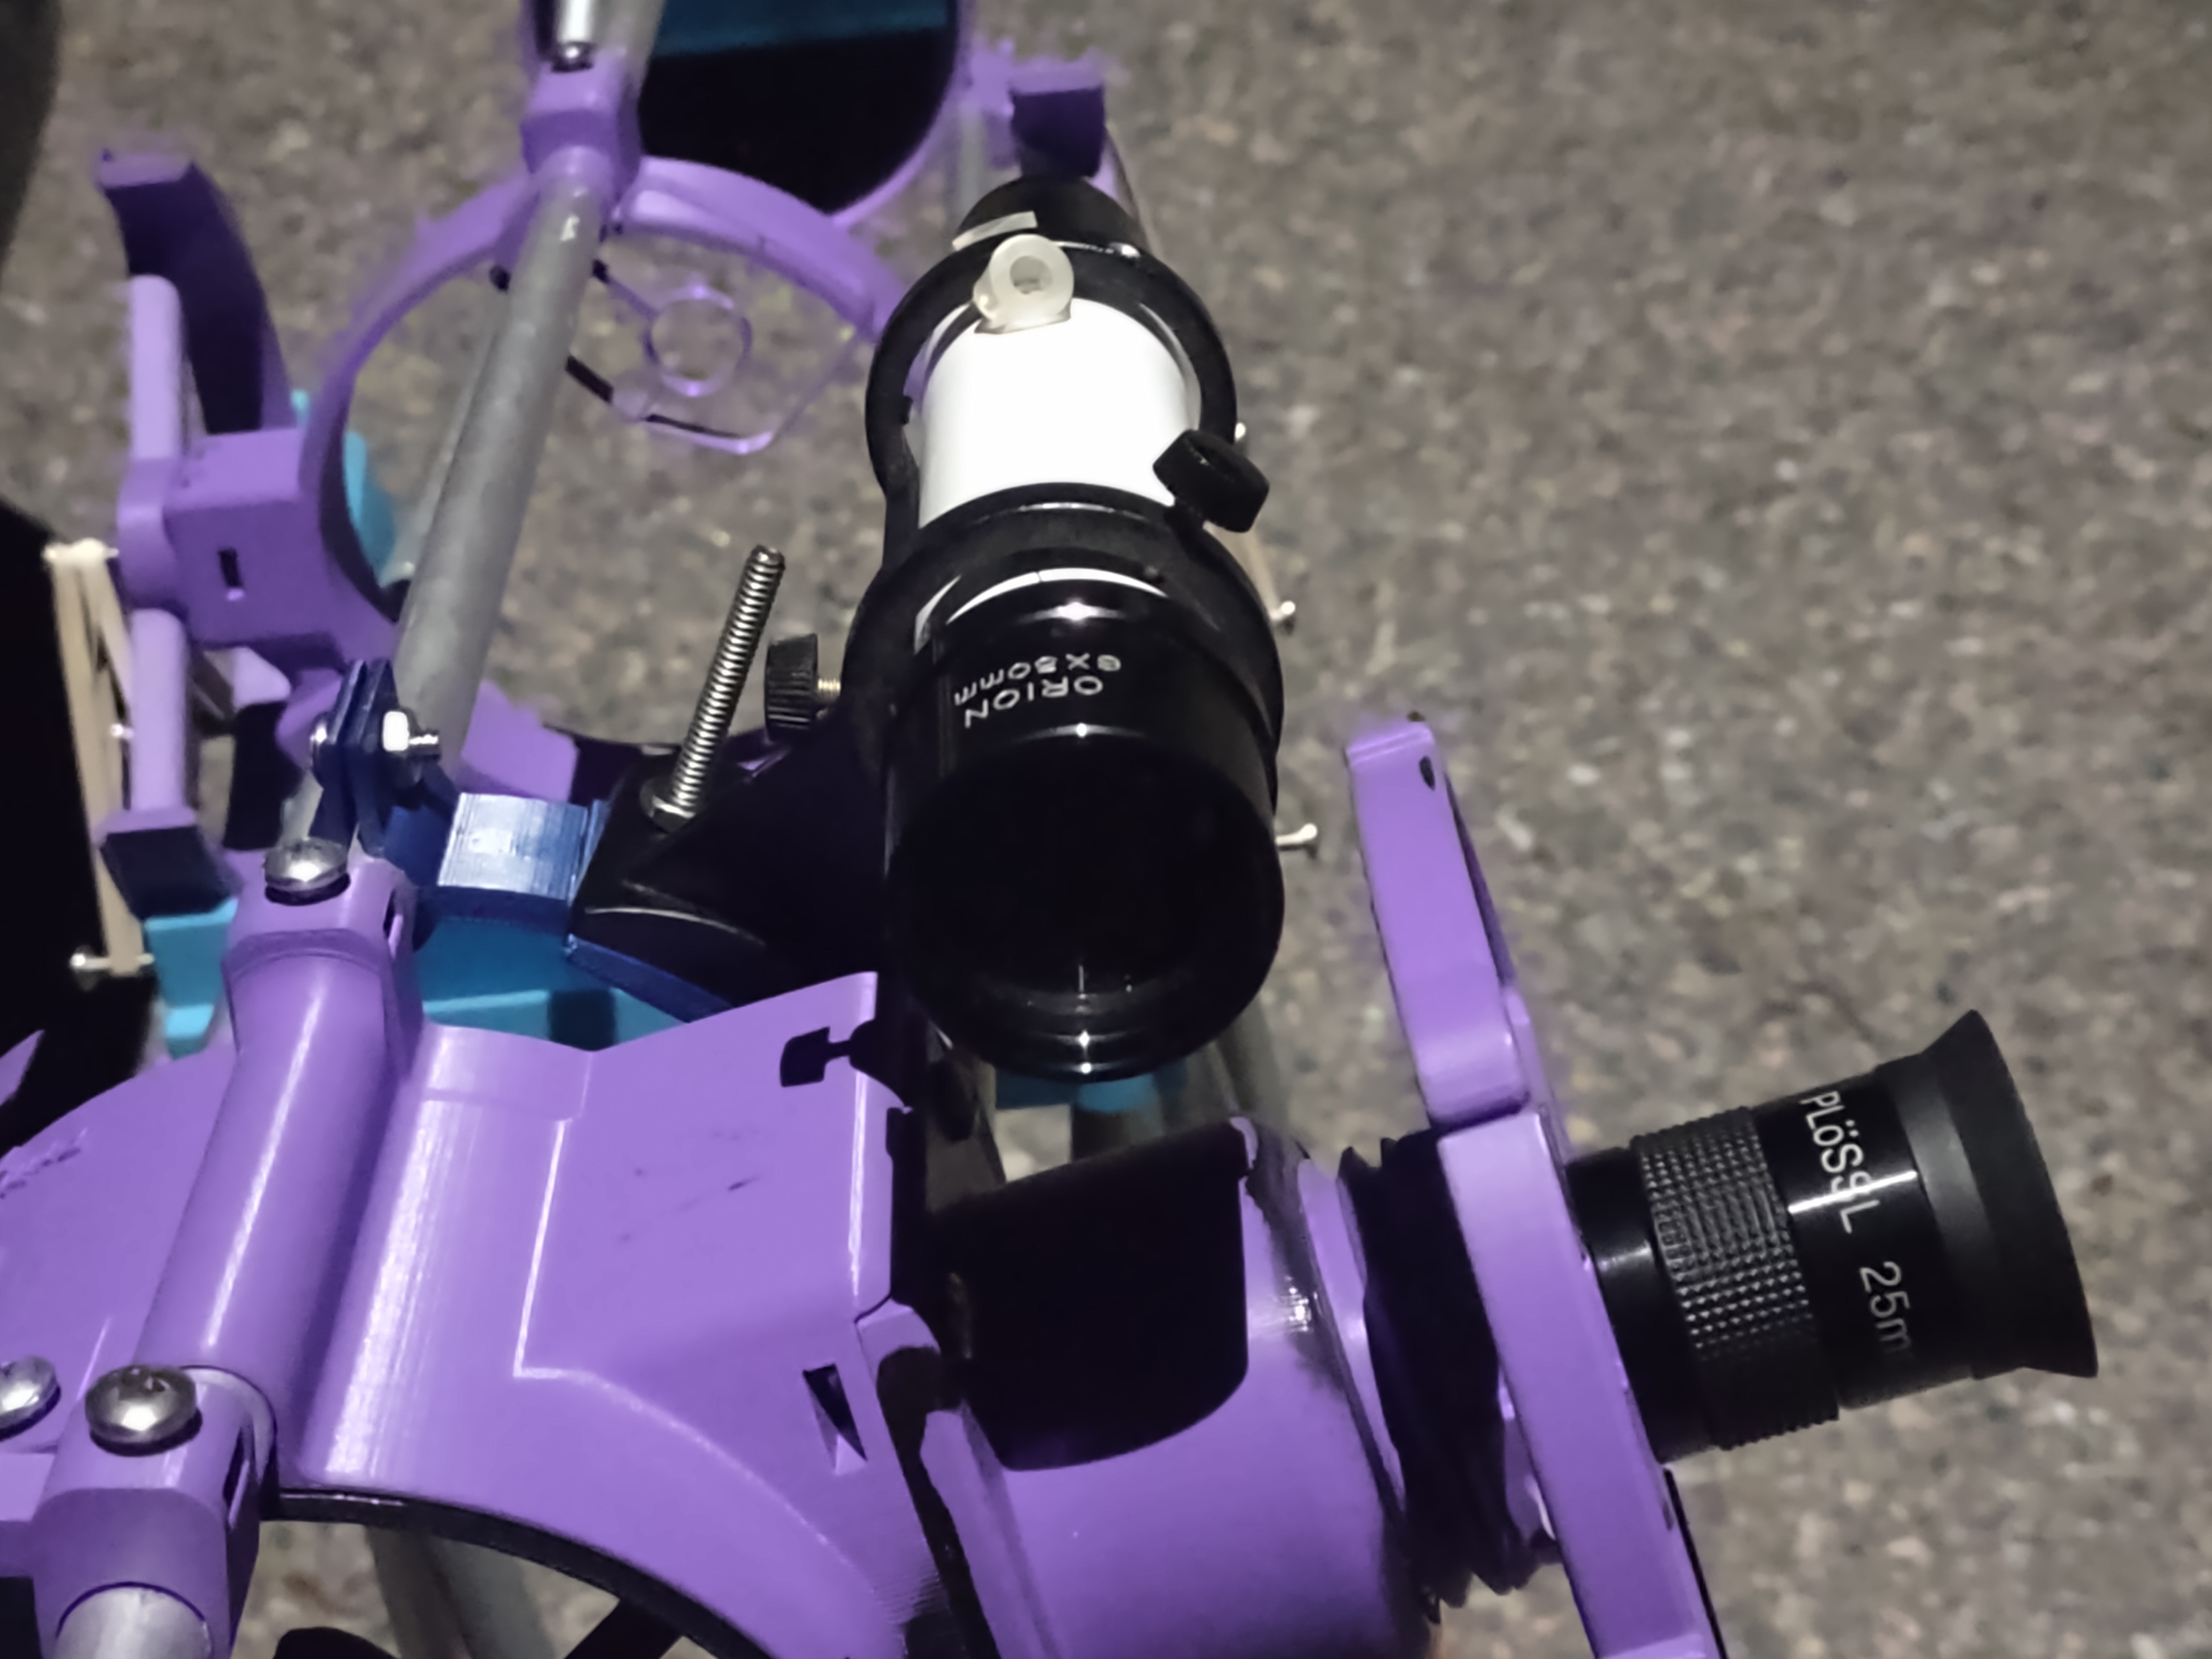
Finderscope
The first upgrade is an 6x50 finderscope that says “orion” on it. I found it in my local astronomy club’s shelf of spare parts and designed a 3D printed adapter for it to fit onto the telescope. It features integrated crosshairs and helps me line up planets at a glance!
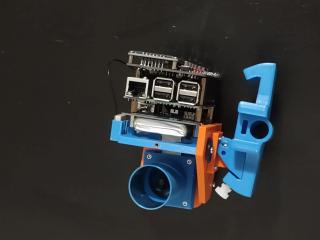
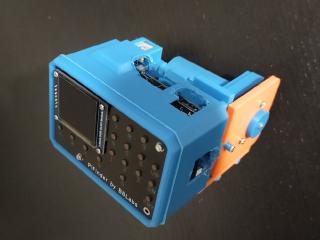
Sliced Pifinder
The second upgrade is the Sliced PiFinder. It’s a targeting computer that permanently lives on my telescope - which is an incredible sentence. We truly live in the future.
The PiFinder is a device that uses a raspberry pi and a camera to take pictures of the sky and compute where in the sky your telescope is aiming, even with high light pollution. Since it knows where the telescope points, you can select a particular galaxy or nebula and it will tell you how to push the telescope to get there.
PiFinders are an open-source project that can also be bought for $500 from the designer. Mine was built for $110 - a mere slice of the cost. The stock PiFinder is designed for a Raspberry Pi 4 using the Raspberry Pi High Quality Camera ($50) with a $50 lens, but I 3D printed and assembled the parts myself, used a scavenged battery pack and previous-generation Raspberry Pi 3 from a defunct project, and a $30 IMX462 camera and $12 lens.
Taking photos on a budget
I like to think of myself as on the cutting edge of cell phone astrophotography. I use a 3D printed clamp to hold my phone up to the eyepiece and take photos using my phone camera. However, tapping the phone button causes vibrations that wobble the telsecope. To fix that, I use a raspberry pi pico microcontroller as a wireless remote shutter. I programmed it to act as a bluetooth mouse and connect to my phone. When I press the built-in button, it moves the mouse to the center of the screen and clicks the “take picture” button. To see pictures this setup has taken, take a look at my Astrophotos page!
| 1 min
| 143 words
Today in observing I:
Tried to get a photo of the ring nebula through the 6mm lens. Realized my finderscope was misaligned, couldn’t get it aligned in time before it sank below a tree. Tried to get a photo of Jupiter, succeeded! Tried out a new phone app named skeyecam that lets you take many many photos with the same settings, for some reason it made Jupiter green. Then I tried taking a photo of m42 through the 6mm lens, but I couldn’t get anything on camera.
Read More
| 1 min
| 58 words
I found this with the help of an amateur with a huge telescope and laser pointer so bright it looked like a line pointing into the sky. Looked like a dim circular smudge to the eye. Picture taken with the 25mm eyepiece, so I bet I could get an even better picture through the more zoomed in 6mm
| 1 min
| 56 words
Reminder to North and South Americans, there’s an eclipse today! https://www.timeanddate.com/eclipse/in/usa?iso=20231014 DON’T LOOK AT THE SUN WITHOUT SPECIAL ECLIPSE GLASSES, EVEN DURING A PARTIAL ECLIPSE! If you don’t have one, take a piece of paper, punch a hole in it, and look at the shadow. Trees or colanders with many holes will make very cool shadows!
| 1 min
| 93 words
I took out a relative’s 8x42 binoculars today. Saw M7 as a faint sparkling of stars, but Andromeda was a much dimmer smudge compared to my telescope that if I hadn’t seen it before I wouldn’t have been able to spot. It I was able to follow a satellite though! And I got to show off Mizar and Alcor to others!
Sadly the moon was out and it was so bright it was casting shadows, stopping me from seeing any nebulae like I was hoping.
Read More
| 1 min
| 153 words
I got to see it with my own eyes for the first time!! It looked like a gray oval-ish but slightly pointy smudge. But it’s a cool smudge in the sky!!
This is a phone pic with a 2s exposure and ISO cranked up to it’s max, 3200. The rainbow snow is random noise from my sensor magnified by turning the sensitivity up very high. You can even see M32 as a slightly fuzzy star almost directly above Andromeda’s core!
Read More
| 1 min
| 53 words
I’ve been thinking about https://www.space.com/liquid-telescope-construction-in-space-ax-1 . I wonder if you could take a circular baking tray, spin it on a pottery wheel, and then pour SLA 3D printing resin into it so the resin would form a liquid mirror, then shine UV light on it to cure it and make a telescope mirror
| 1 min
| 55 words
The code’s open source, so I looked through it. Turns out every time it tries to draw a map of the sky, it loops through every single star in the sky down to magnitude 7.5. Every frame. Sigh
At least it’s open source, so I can probably add some caching and massively speed it up.