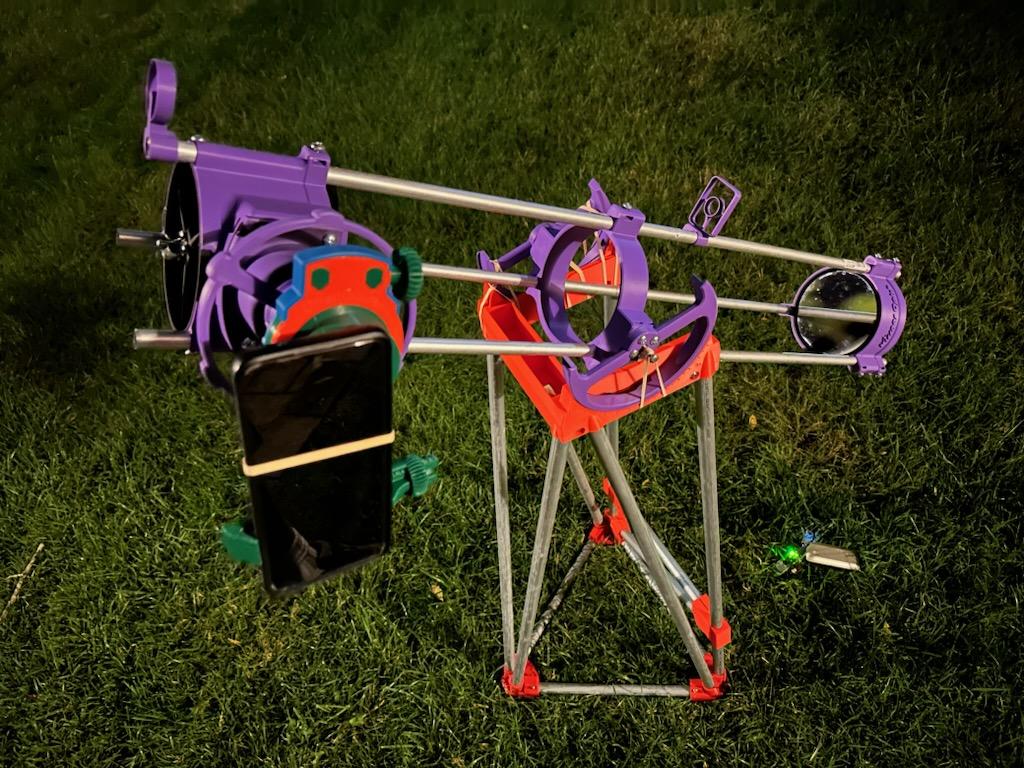
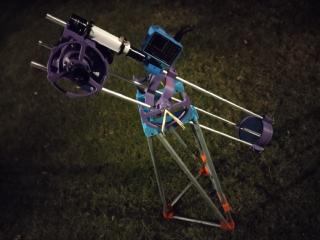
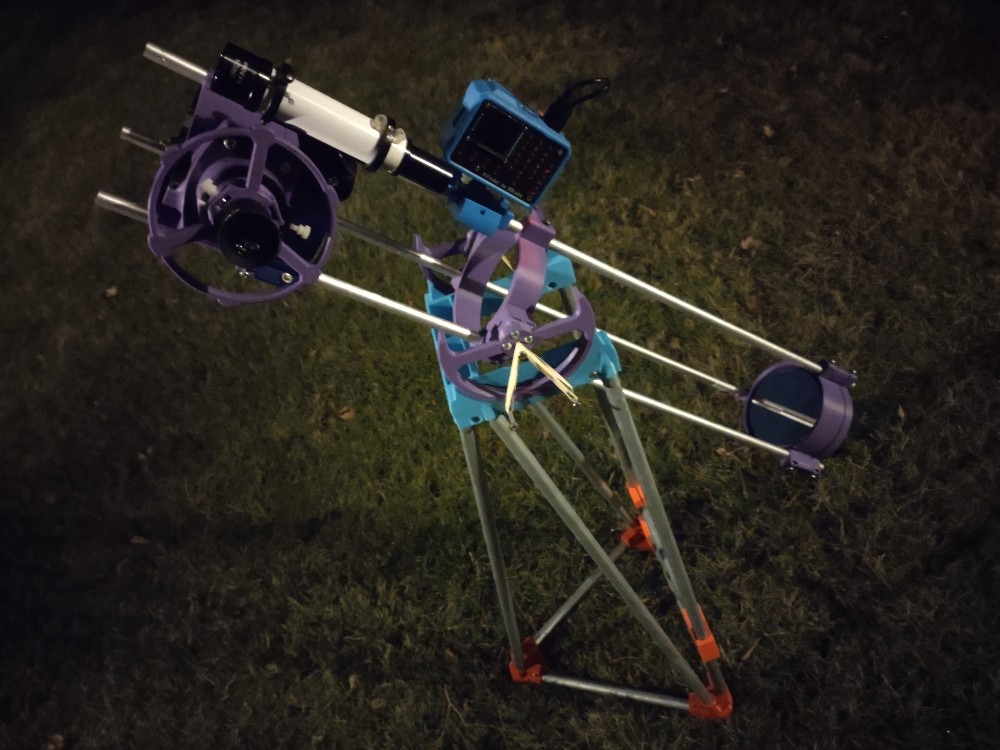
This little 3D printed telescope kickstarted my journey into astronomy. The design is free and open source, and uses 3D printed parts, aluminum tubes, and hardware store nuts and bolts.
It sits on the Hill Mount, a portable and cheap altitude mount I designed that costs around $20. It’s lightweight enough I have walked two miles to a subway stop while carrying it the whole time.
Azimuth is controlled by physically sliding the plastic across the ground. Sure, I could put it on a turntable, but that would make it heavier.
It has a number of upgrades - including an integrated finderscope and a high-tech computerized aiming system I printed and hand-soldered myself.
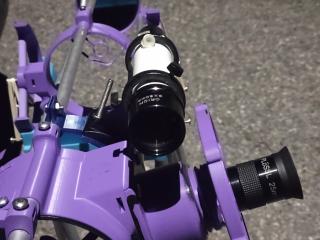
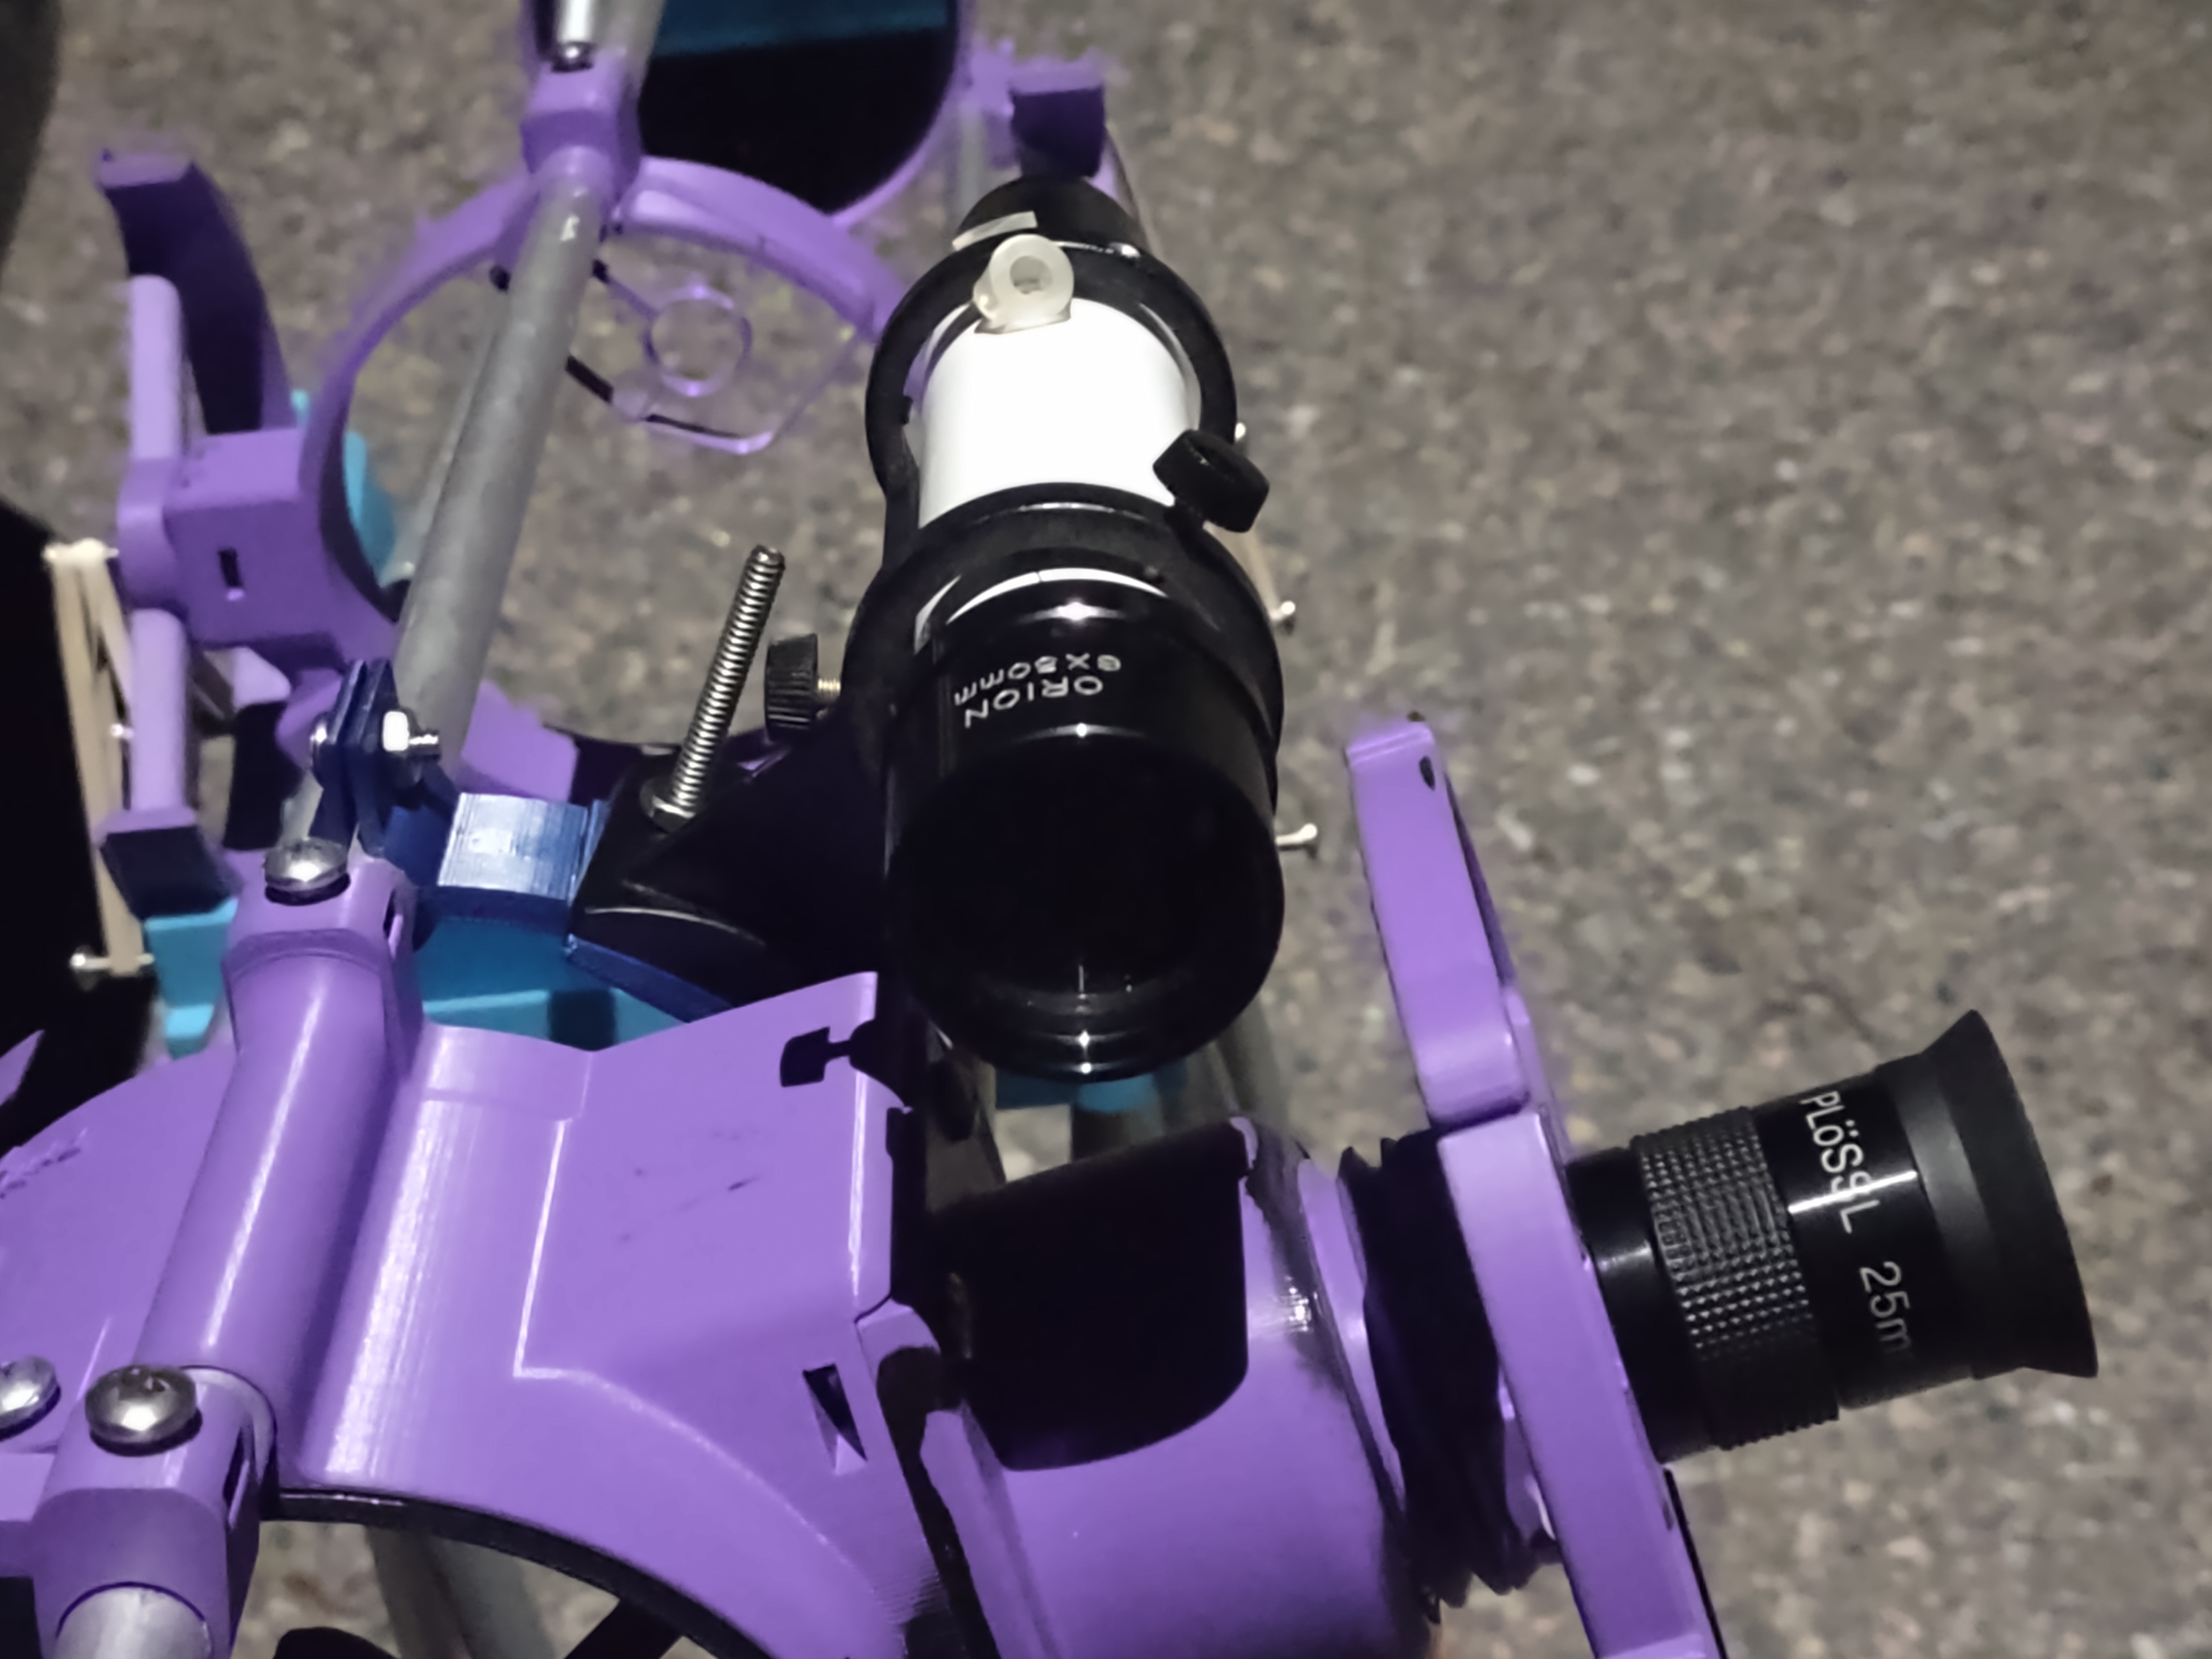
Finderscope
The first upgrade is an 6x50 finderscope that says “orion” on it. I found it in my local astronomy club’s shelf of spare parts and designed a 3D printed adapter for it to fit onto the telescope. It features integrated crosshairs and helps me line up planets at a glance!
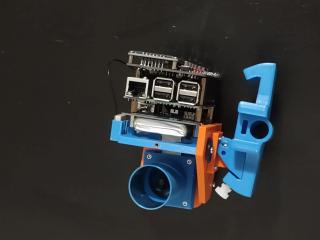
Sliced Pifinder
The second upgrade is the Sliced PiFinder. It’s a targeting computer that permanently lives on my telescope - which is an incredible sentence. We truly live in the future.
The PiFinder is a device that uses a raspberry pi and a camera to take pictures of the sky and compute where in the sky your telescope is aiming, even with high light pollution. Since it knows where the telescope points, you can select a particular galaxy or nebula and it will tell you how to push the telescope to get there.
PiFinders are an open-source project that can also be bought for $500 from the designer. Mine was built for $110 - a mere slice of the cost. The stock PiFinder is designed for a Raspberry Pi 4 using the Raspberry Pi High Quality Camera ($50) with a $50 lens, but I 3D printed and assembled the parts myself, used a scavenged battery pack and previous-generation Raspberry Pi 3 from a defunct project, and a $30 IMX462 camera and $12 lens.
Taking photos on a budget
I like to think of myself as on the cutting edge of cell phone astrophotography. I use a 3D printed clamp to hold my phone up to the eyepiece and take photos using my phone camera. However, tapping the phone button causes vibrations that wobble the telsecope. To fix that, I use a raspberry pi pico microcontroller as a wireless remote shutter. I programmed it to act as a bluetooth mouse and connect to my phone. When I press the built-in button, it moves the mouse to the center of the screen and clicks the “take picture” button. To see pictures this setup has taken, take a look at my Astrophotos page!
| 1 min
| 48 words
There’s a galaxy (named M33) in most of this picture
but it’s so faint I couldn’t see it by eye or by camera :(
The pifinder helped me find this place, so I took like 30 exposures in the hopes that I can stack them and see it
| 2 min
| 239 words
Oops. NOW my Sliced PiFinder is done.
The original PiFinder uses a $50 USB GPS module. To avoid spending $50, I wrote some code to fake a GPS. Eventually the dev brickbots switched PiFinders to a $10 solderable GPS module that uses UART instead of USB, and $10 felt reasonable, so I bought one and soldered it in. I thought I was done and that all I had to do was edit the software to remove my fake GPS code and use the regular GPS code!
Read More
| 2 min
| 265 words
I’m building the Sliced PiFinder, a device to help my telescope find things! Previously, I tried using a cheaper IMU but gave up and bought a $30 fancy chip.
Originally I didn’t want to buy a $50 GPS USB stick but the PiFinder creator found a $10 solderable GPS unit for a v2, so I bought one and soldered it in.
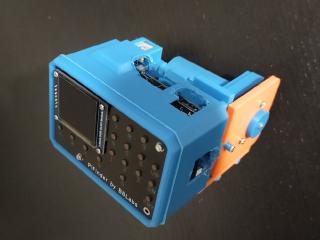
After soldering in the GPS chip, dubiously electrical taping it in place, dropping it and cracking my 3D printed parts, printing new parts, using a soldering iron to remove heat inserts out of the old parts so I can place them into the new parts, printing the case, discovering the case wasn’t designed for my battery and blocks access to the on/off switch and USB ports, melting holes in case with soldering iron, putting on a cover plate over the screen and LEDs… I finally put it on my telescope!
Read More
| 1 min
| 40 words
Perseus double cluster
Equipment used: my 3D printed 4.5" telescope, custom mount, Pico pic-taker button, my phone
I have a raw version of this where some stars are noticeably blue or orange but it has more camera noise than this
| 10 min
| 2107 words
I’m building a PiFinder! It uses a camera to take pictures of the sky, connected to a raspberry pi which uses a database of stars to tell you where in the sky your telescope is pointing. But a PiFinder is $550 new. A stock pifinder uses the newest and most expensive options for pis and cameras, and when I looked at the parts list, I thought: I can build something similar for a fifth of the price!
Read More
| 2 min
| 357 words
The pifinder is a tool to help you aim a telescope. It uses a camera to take pictures of the sky, connected to a raspberry pi which uses a database of stars to tell you where in the sky your telescope is pointing. Then, if you want to find a specific object, it tells you what direction to move your telescope in.
I’m building a janky pifinder with some nonstandard parts: instead of a $60 raspi 4 and $50 HQ camera and $25 lens and $30 IMU, I’m using a $10 lens, a secondhand raspi 3, and a cheap “pi camera module v1” from 2013 that was attached to the raspi, and a $20 IMU with unpronounceable name I found lying around in a drawer of sensors.
Read More
| 1 min
| 136 words
Pifinder update: the new $33 camera arrived! But it’s slightly bigger than my previous camera, so I had to design a new part to hold it. While the pifinder was designed with M2.5 screws, this camera only accepts smaller M2 screws. I had to go to the hardware store yet again.
The pifinder is designed for a raspberry pi HQ camera ($50). Originally instead I wanted to use a pi camera module V1 ($10, from 2013) because I recycled it from another project, but it didn’t work too well.
Read More
| 1 min
| 71 words
I built enough of a pifinder to test it! This pifinder is using a pi camera v1 because I salvaged an old secondhand pi project… and it was able to see one or two stars, but not much more because of light pollution. Not enough to see the stars and plate solve to see where in the sky it was aimed at. I ordered a better $33 camera, maybe that’ll work
| 1 min
| 103 words
The first picture is at 36x zoom, the second one at 150x zoom. The more zoomed in one is fainter because the same light is spread across more area, but you can see the four trapezium stars as four separate streaks!
This was a very frustrating night for photography because finding things in a big sky is hard. Light pollution made it hard to see M31, I couldn’t find M33, and then finally clouds rolled in and it became a race against time to photograph the Orion nebula M42.
Read More